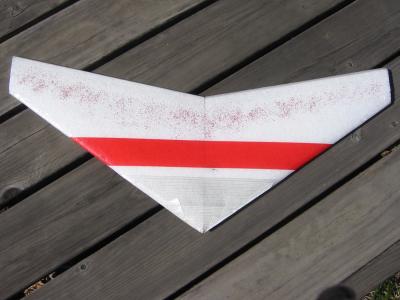
Time To Cover Ultimately I'm crappy at this and have only made clear or colored tape work. So that's what I use. Well, plus a little art-store cheapo glitter on this one. Not sure I'll do that any more. Currently I cover in three stages: first the trailing edge, then the bottom, then the top. I start by applying two lightish coats of Super77 spray glue (letting the first dry for about five minutes). Only cover the area you're about to work. I find the trailing edge a bit nerve wracking, so I like to do it as a separate project. You may wish to combine it with covering the lower side. It's more or less universal to say "start at the back" but seldom clarified why. It's because if you don't, all manner of crud will slip in between the tape seams when you land (or crash). Ask me how I know... I stopped at this point to shoot a photo for two reasons. First, the single red tape line is positioned so the back of the tape is the suggested CG balance point (in this case, 6.5 inches from the nose). This will make balance checking much easier later. The other reason is I'm about to start putting on strapping tape (only in front of the CG). This is (I think) a Slofly No-No, but I nose in far too often to skip it.
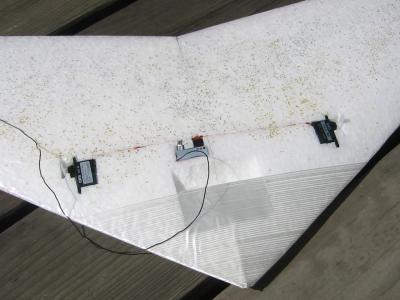
Lay Out Your Electronics Within reason, the further you can get the servos from the center, the better position you'll get for your control horns on your elevons. In this case, the PicoBB's servo line is to the max on the right of the picture, and slightly less on the left so they're even. I do like to have them planted in the thickest part of the airfoil. I've already added the strapping tape. The pocket is made by cutting a piece of tape the same width, then sticking it to the 'down' side of the cover tape. Fold it over the edge and forward, then place another strip of cover tape later to make sure that leading edge is not exposed. In this case, I just used clear tape.
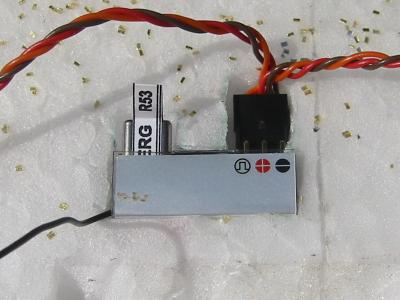
Closeup Of Receiver Before taping it over, I'll fold the channel number under the crystal. Make sure you test the function before you tape things shut. You never know, and finding out when you have to pull it all back out is a drag. Pay particular attention to making sure your servos are plugged into the right slots. I haven't said anything about balance yet because, as a rule, you want to place all these components (particularly the battery) as far forward as is reasonable. Nose weight is precious and rear weight is cheap. So try to find all the nose weight you can, then balance things out using motor position. |
Copyright 2004 by David Mark North