How I Built My Mini-Slofly Wing
|
This is not intended to be a "Howto" because (a) it breaks some rules and (b) it's enigmatic to me. It's just how I did it and some of the ideas may be useful to other folks. 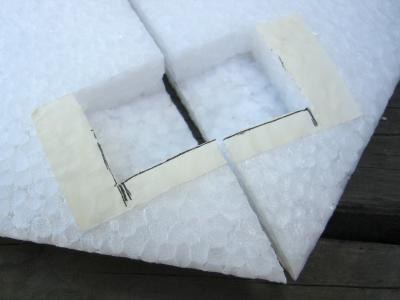
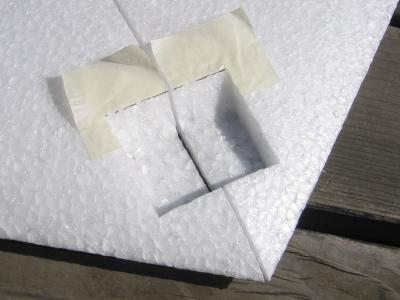
Cutting The Battery Holder The very first step in any wing I make is cutting the pocket for the battery. It's just easier to get the flat bottom for the LiPo pack before the wings are joined. Note the masking tape: once you tape the wing you can use ink to mark cuts -- it will rub right off. But when working with raw EPP, lay down masking tape first and mark on that. Or put up with funky lines on your plane. Up to you. I assume other people use pockets like this, but I haven't seen any. Maybe it's an innovation (I doubt it).
Cut The Bevel Then I glued the halves together (Shoe Goo -- accept no substitutes!) Steve suggests just using tape instead so you can undo the bottom tape and fold the wing for transport. A great idea, but too late for this wing. Also, I'm still not sure about how to route the wires, and the battery compartment I use would not work. So maybe not. We'll see. If you do decide to glue, make sure you're working on a flat surface (to get a good match between halves) and use a bit of wax paper under the joint (so you won't worry about dribbles or the support surface sticking to the joint).
Cover Tips and Elevons While Wings Dry For one thing, you won't want to do it later in the fever of completion, so now's a good time to tape up the elevons and tips. It's just donkey work, and won't take that long. The wings should be ready to work on in about fifteen minutes or so. I got the 'fade' effect using plain old spray paint from Orchard Supply. Works fine on EPP but will cause it to bend a little ... if you watch it happen and counterbend while the paint dries, it will end up straight. Also note the shape. The top of the elevon is flush with the point at the rear where the tip angles. This puts most of the tip above the wing, but a little below. I think this works better to counter tip turbulence, which is one of the points of 'tip tanks' (which are often placed completely below the edge of the wing). |

Copyright 2004 by David Mark North